I am learning SO much.
I'm learning heaps about the more technical aspects of photography. The mathematics behind depth of field, hyperfocal distance... far out, and I thought it was just "If I want the background out of focus, I just open up the aperture". Apparently not.
I've been shown a huge studio set up and got to sit in on a portrait shoot. I was shown and explained the lighting setup for the official naval portraits. I also got a brief tour on the area set aside for shadowless photos and for photos of small objects on a plain background. Doesn't sound exciting but I'm having a ball.
Tomorrow I'll be going out to HMAS Cresswell to start my assignment. That's to take at least 1 usable photo at an official "job" and get it from request to ready for release. Unfortunately I won't be using the Canon 1D I'll be using my own camera. And because they use Canon and I use the enemy (Nikon) I'll be probably using my own lens too. Oh well, excitement ahead either way.
Tuesday, May 20, 2008
HDR (High Dynamic Range)
When you point your camera at something, the camera can't always pick up the entire range of light and shadow. Or more precisely it wont pick up the detail within the light and shadow, like your eye can see. The parts that it doesn't get are either too dark (ie black) or blownout (too bright). To overcome this we can use HDR.
By taking a range of photos of different bracketed exposures you can get the detail from the shodows and from the highlights. Generally a range 1 to 2 EV steps either side of 0 will be enough. ie -2ev, -1ev, 0ev, +1ev, +2ev. This is where the Nikon D40x is letting me down. On some cameras you can set it to take a range of shots within an exposure range automatically. This is called auto bracketing. It will happen a lot quicker than taking a photo, then changing the exposure up or down a step then taking a photo...repeat. Lots can happen in that time. Clouds can move a long way, trees sway, animals &/or people will move... you get the idea.
Come on Nikon, update the D40x with auto bracketing!!!
Anyway...
Now the trick to blending these photos is up to the individual. Photoshop CS3 has an automated process found under File - Automate - Merge to HDR. I'm not sure whether earlier versions of Photoshop have this or not. I find that CS3 is too subtle for my liking so I use a program I mentioned earlier called Photomatix. There are tutorials on the net for this everywhere. I love it. One of the great things about Photomatix is being able to make a HDR style picture (though not true HDR) from a single RAW file. This is handy but the process introduces lots of noise. Sometimes it looks good, other times not. You could get rid of the noise through Photoshop &/or noise ninja (Photoshop plugin), but I'm too lazy yet. But there are literally dozens of ways to make HDR. CS3's HDR processing is alright, but Photomatix just makes the shots POP. Some people do find the Photomatix effect too much... not me. Personal taste I guess. There's an awesome tutorial on www.stuckincustoms.com. Search around there for some great HDR photos and a fantastic tutorial for Photomatix.
If you can't justify $100ish on Photomatix, fair enough. Presuming you have a version of Photoshop you can merge your photos into layers from within the document. Doing this could be a timely but satisfying experience, watching your HDR photo appear before your eyes as you erase bits of one layer to reveal the layer underneath, showing details within heavy shadows and repairing blownout sections.
Sunday, May 18, 2008
Work Experience
This week I am going for work experience with the Navy Photographers on the base. I think they have a few things lined up for me. Monday morning will involve a portrait shoot, I don't think that I'll be too involved there. But, I will be getting a 2 part assignment. Part 1 is taking the photos (hopefully with one of their new Canon 1Ds cameras :) ), part 2 is processing. The Navy have strict guidelines for taking, and storing photos. They also use Adobe Photoshop CS3 and Adobe Raw, so at least I'll be ahead when it comes to those 2 applications.
Anyway, the point of the assignment is obviously to assess my ability to work within a time frame and my photographic ability. I guess all the usual things like compositon, exposure, etc.
I also have to provide a portfolio... putting that together was interesting. I like shooting landscapes and inanimate objects, so trying to get a bit of diversity in my portfolio is harder than it sounds.
Oh well, here goes... wish me luck!
Monday, May 12, 2008
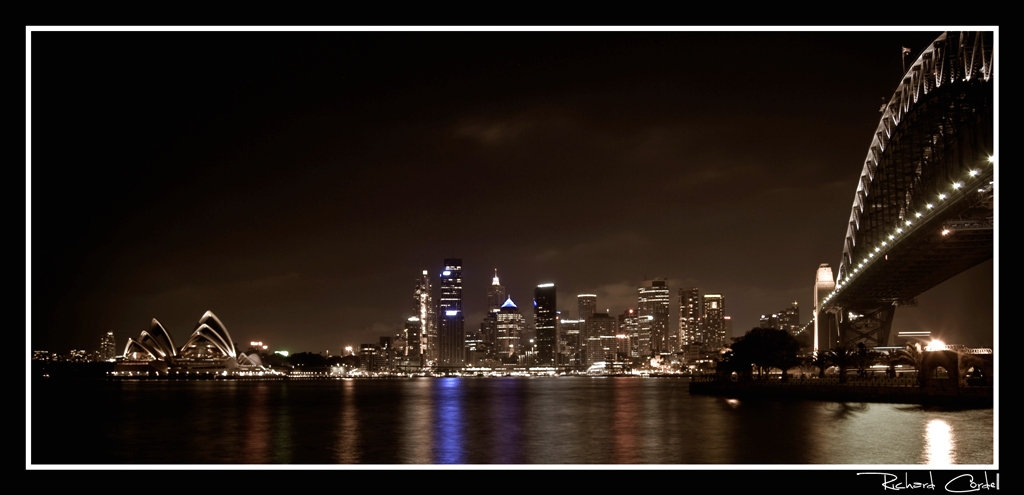
Sydney By Night
There are 2 main schools of thought when it comes to photography at night. Actually there are probably more than two, but that's irrelevant.
One is to take a spot meter of certain areas and then calculate the settings you'll need to correctly expose the frame... or you can fire and pray.
I'm a fire and pray kind of man. I know what I need to let in the maximum and minimum amounts of light. It's finer things like exactly how long I need to set the shutter to be open for to get the effect I'm after. Setting white balance if there are a few different light sources (Moon, fluro lights, street lights, etc). The small things that are fun to change and see the effects. Like the difference on the water between a 5sec exposure and a 15sec exposure. I don't like going into a situation with as much potential as Sydney Harbour with a fixed idea in my head or it clouds my want for experimentation. One night at 9pm it might look good after 5 seconds, 2 nights later it might need 20 seconds. I like to experiment with these sorts of things. There is a calculator online to help with working these timings out, but who cares.
So, on my last weekend away with my wife before we have our first child in 2 weeks, I took the camera to take photos of Sydney Harbour at night. I'm the last of the romantics I know.
Nothing special here, just an Adobe Camera Raw preset and some level adjustments. Hope you enjoy.


Subscribe to:
Posts (Atom)
